Eclipse and WDT
We are using Liberty as the server runtime and Eclipse as the IDE with WebSphere development tools (WDT) to enable iterative development with incremental publish. We are big fans of these tools because they’re very efficient: no build, repackage, or restart steps are required before your changes are live in the server.
Getting this setup to work with our Docker images does require some first-time set up, but after that, it’s smooth sailing for development.
This approach requires the mounted volumes provided by docker-compose.override.yml.
Getting Eclipse and WDT
The easiest way to get both Eclipse and WDT is via wasdev.net.
- Step 1 contains the link for the latest Eclipse for Java EE developers
- Step 2 contains a drag-and-drop link to install the latest copy of WDT.
Build and import Eclipse projects
Begin by building the eclipse projects in the submodules:
./eclipse.sh
Fire up eclipse, and use File → Import, and in the resulting dialog, start typing the word Existing and select Existing Projects into Workspace as soon as it appears.
Select the gameon directory created by the git clone operation.
Tick the Search for nested projects box and press Finish.
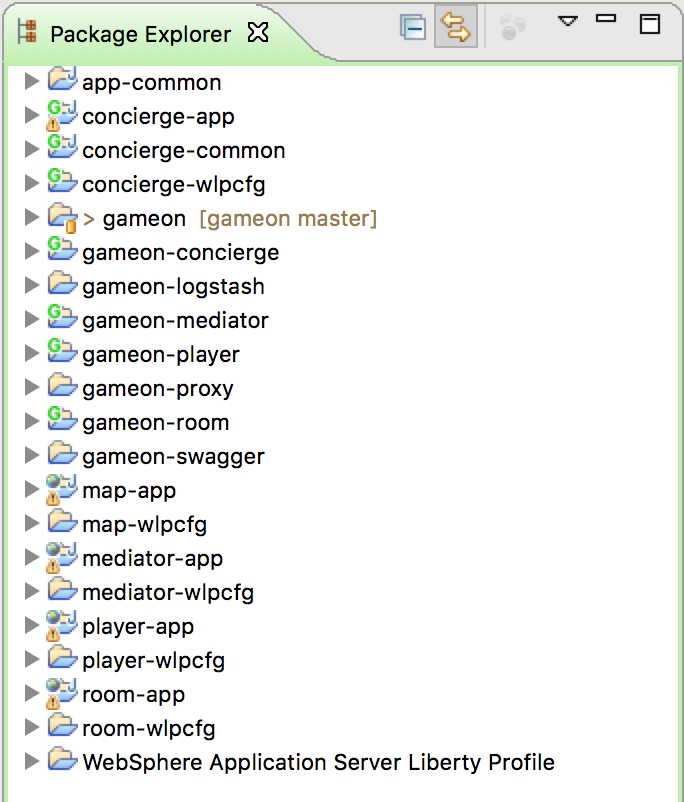
This should result in a collection of projects being imported to the workspace as shown in Figure 1.
Integration with Liberty and WDT
For the full 'run in eclipse' support we need to have eclipse believe that our applications are being deployed to servers it manages. On it’s own, Liberty will monitor applications and server configuration files for changes, and will push configuration updates and/or re-start applications as necessary.
Full integration with WDT does bring some additional benefits, but there is currently a disconnect between how WDT would control a server in a docker container (as a remote server) when the file system is local to the host and no file transfer is required.
So, until we get that sorted, we’ll do the following:
- Download Liberty from wasdev.net, and extract it to a well-known but nearby location. This copy will be used for compilation, rather than for running the application.
- Use the
installUtilitycommand to update the installation to include the features our servers need. Theliberty-features.shscript will take care of this for you, iterating through each project with a*-wlpcfgdirectory to make sure we have all of the referenced feautures for defined servers.
You now have WDT installed and ready (per earlier steps), and a runtime installed that has all of the features our servers need. We now need to tell them about each other.
Create the Runtime Environment
- Open the 'Runtime Explorer' view:
- Window → Show View → Other
- type
runtimein the filter box to find the view (it’s under the Server heading).
- Right-click in the view, and select New → Runtime Environment
- Give the Runtime environment a name, e.g.
wlp-2015.11.0.0if you’re using the November 2015 beta. - Select the existing Liberty installation
- Add project-specific user directories:
- Click the
Advanced Options…link - For each
-wlpcfgproject (e.g.player-wlpcfg): Click *New, and select it - Click OK when all
*-wlpcfgprojects are shown in the list of user directories
- Click the
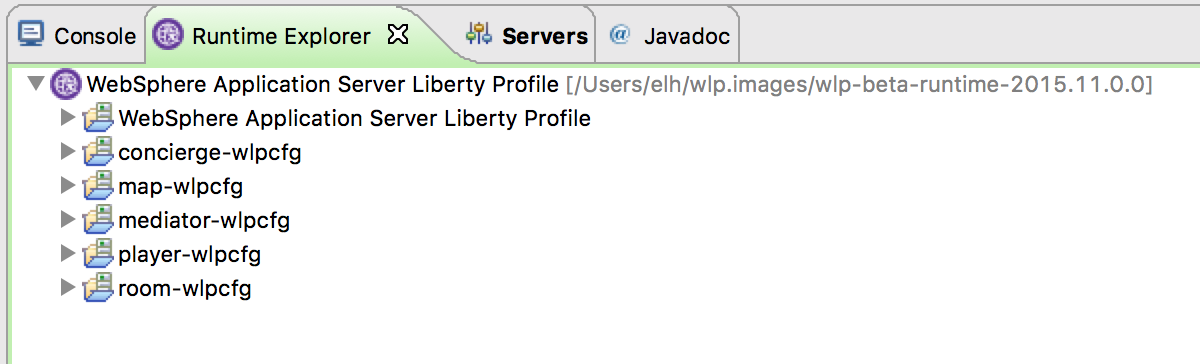
- Click Finish to create the Runtime Environment. The Runtime Environment view should look something like Figure 2.
Create WDT Servers
WDT has its own representation of the server, which show up in the Servers view:
* Window → Show View → Other
* type server in the filter box to find the view (it’s under the Server heading).
- In the Runtime Explorer view, Right-click on the newly created Runtime Environment, e.g.
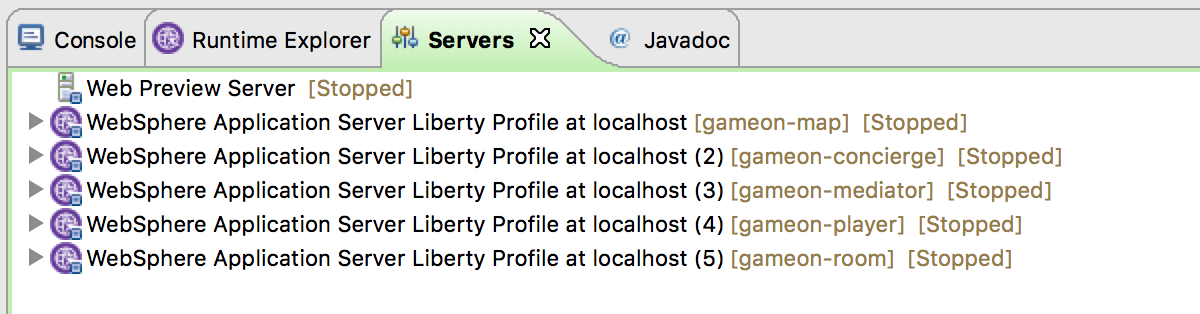
wlp-2015.11.0.0, and select New → Server.- The resulting dialog should be pre-populated. The "Liberty profile server" drop-down box will contain an entry for every configured server for that runtime environment.
- For each
gameon-entry in the drop-down, select it, and click *Finish to create an Eclipse/WDT Server.
Deploy the application to the server
WDT defines a very handy stand-in for the packaged war: a loose configuration file. We’re going to deploy our applications to the liberty servers, and WDT will replace our built wars with xml files that act like wars, but that serve the contents directly from our eclipse project.
For each server:
- Right-click on the server in the Servers view, and select Add and Remove…
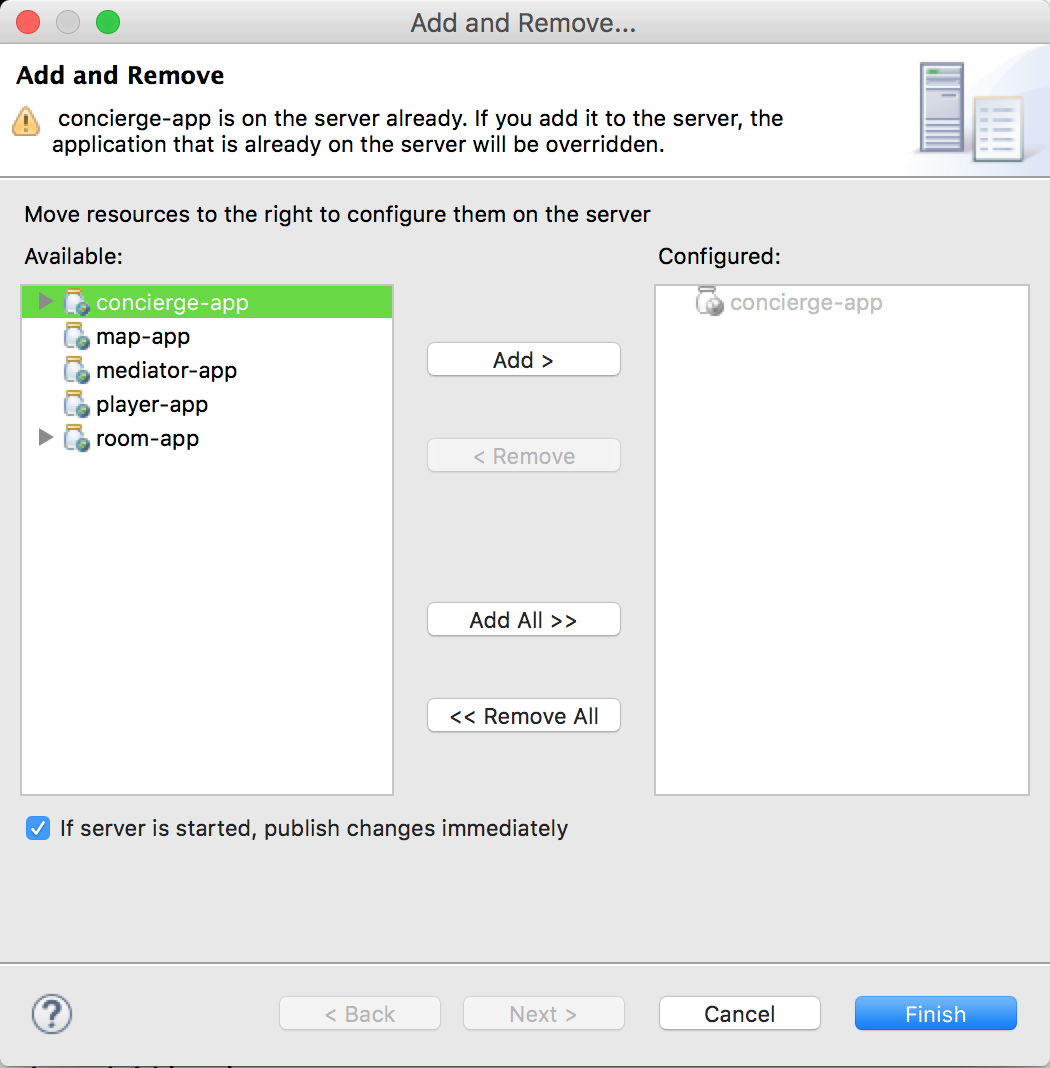
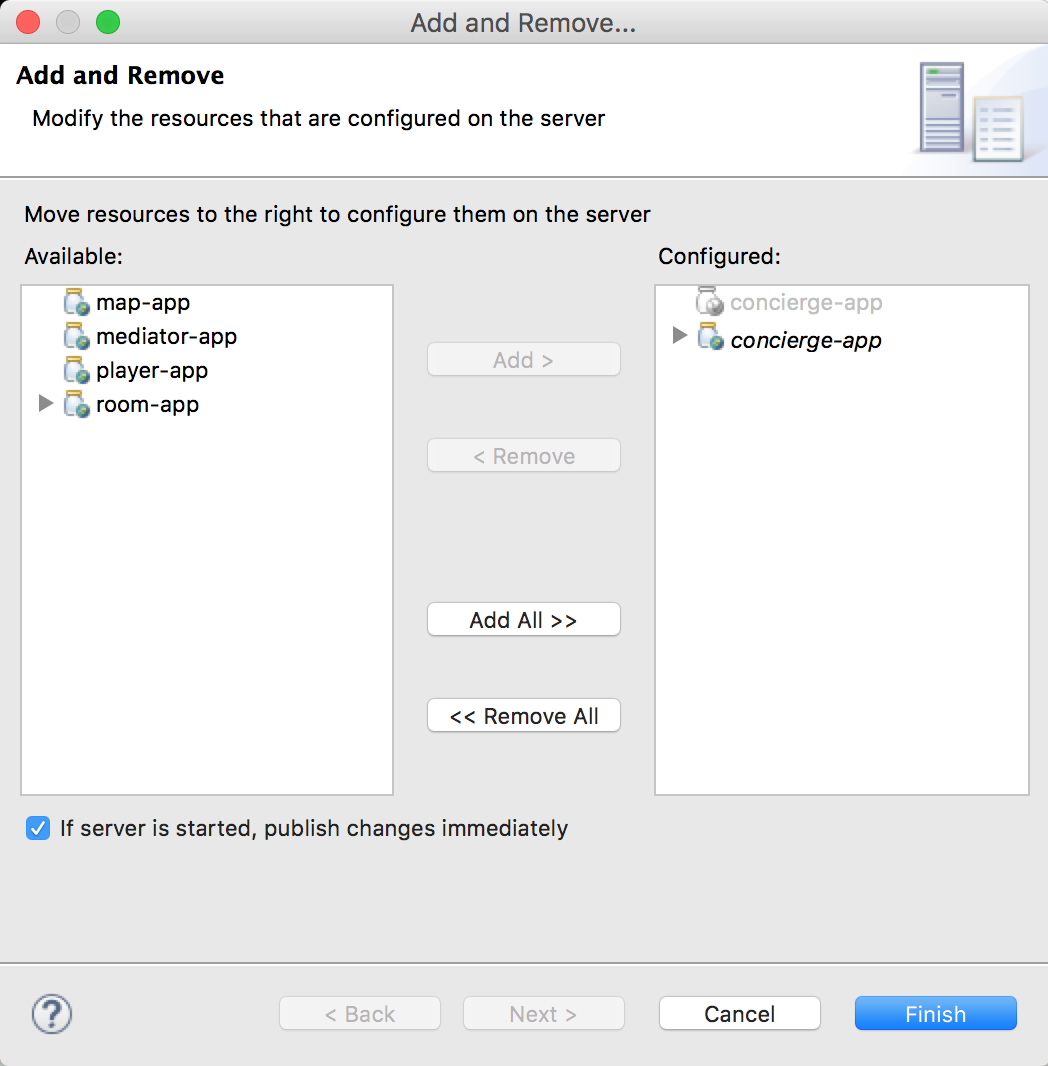
- In the dialog that opens, you will see an application with the same name in both the left and right-hand side of the dialog. Select the application in the left-hand panel as shown in Figure 5, and click Add > to add it to the application as shown in Figure 6.
- Click Finish.
- Right-click on the server again, and select Publish.
- You may see warnings that the publish failed. These can be ignored.
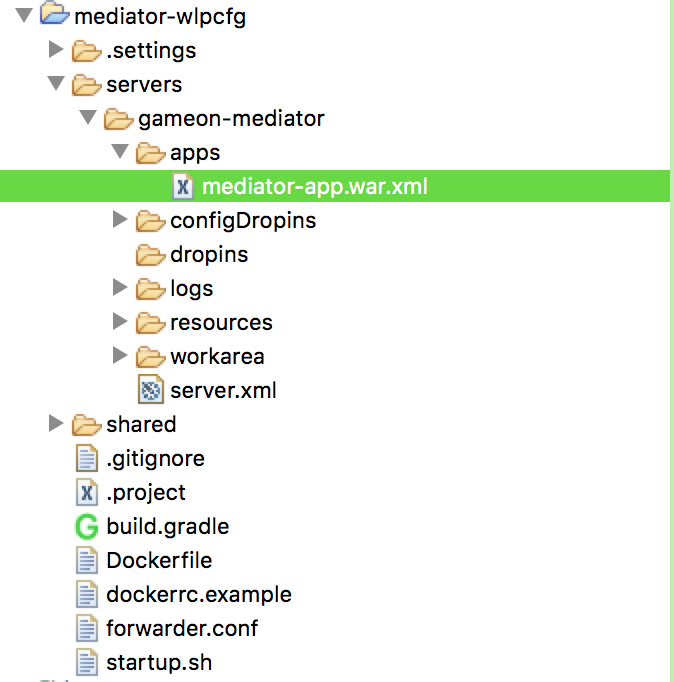
- Open the corresponding
-wlpcfgproject. Verify that theservers/gameon-/appsfolder now contains a*-app.war.xmlfile as shown in Figure 7.- You may need to refresh the view to see the updated application
- If the
*.warfile created by thebuild.shstep is still present, you may remove it to avoid problems later.
- Discard any
server.xmlchanges made by WDT for the project.
All done!
Congratulations!
- The Docker Compose configuration mapped your local filesystem into the Docker container
- You now have Eclipse projects that reference the same source and Liberty configuration
- WDT has created a loose configuration file to replace the built/packaged war
You can now make application updates within your Eclipse projects, and see the results running live in your local development server without having to build/package/redeploy/etc.